Recording and editing audio transcripts in Zoom
We ask that you please record your presentation in Zoom so that an audio transcript can be automatically generated. We will then ask you to review and edit this audio transcript (see below).
Zoom allows unlimited time free of charge for individual recording. Many Universities have free accounts. Please do not hesitate to contact us, should you have any questions!
The steps below will help you do the following:
- Record your talk OR poster lightning presentation.
- Talks:
20 minute pre-recorded talk (synchronous) + 10 minutes Q&A- For talks, we will show the pre-recorded video for the first 20 minutes of your timeslot, then allow it to be viewed via your OSF page.
- You will participate in a LIVE 10-minute Q&A session immediately following the showing of the recording.
- Posters:
3 minute lightning talk (asynchronous) + live breakout room during poster session- For posters, your pre-recorded lightning talks will be available for viewing via your OSF page.
- You will present your poster LIVE in a Zoom breakout room.
- You may present a traditional poster format or have slides available.
- Talks:
- Review and Edit the audio transcript. (Please note that this is extremely important for those needing the captioning. Linguistic terminology and a variety of accents or dialectal variation are not always accurately captured!)
- Obtain the cloud recording Zoom link, which contains the edited audio transcript.
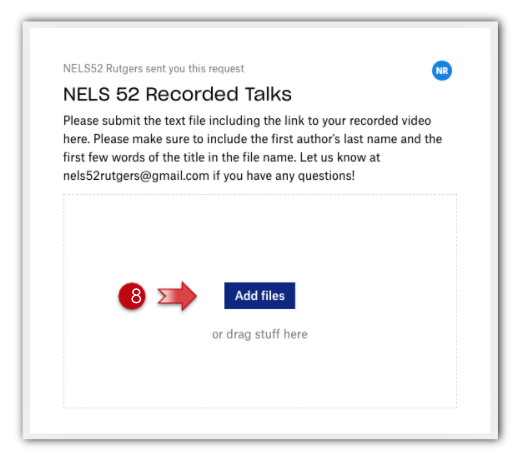
- Share this link by uploading it to the NELS52 Dropbox.
-
Set up Zoom to Record your Talk
-
- Before recording, get yourself ready in Zoom and make sure you have all the right settings!
- Download Zoom to your desktop. Zoom can be downloaded at this link.
- Next log in to Zoom to enable the settings that will allow you to record with an audio transcript generated. You may go to zoom.us, or else log in via your University’s domain (e.g., rutgers.zoom.us).Then follow these steps.
You may follow the steps below and/or watch this video demo!
Click on the images below to view them in full size.
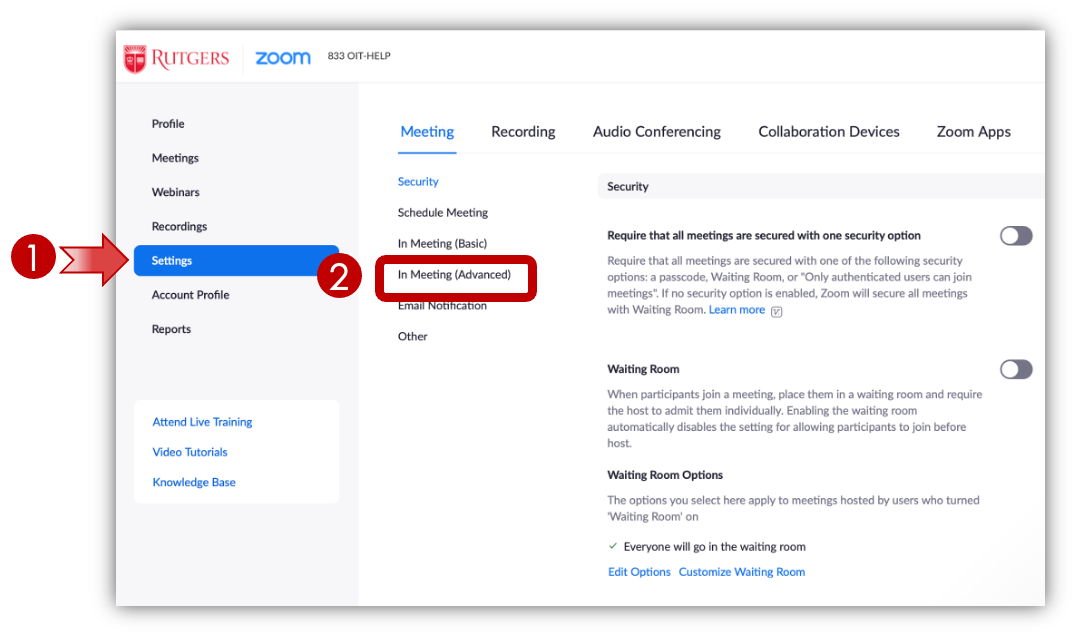
- Use the left navigation menu to select Settings.
- Navigate to In Meeting (Advanced).
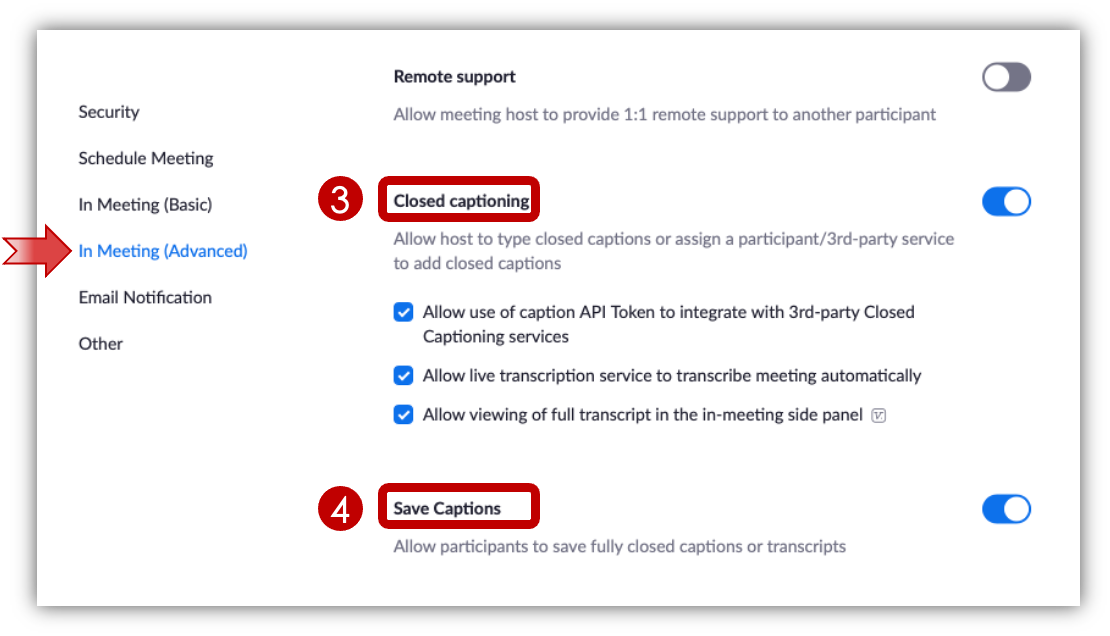
- Once in In Meeting (Advanced) make sure that all options under Closed captioning are toggled on.
- Also make sure that Save Captions is also toggled on.
-
 Remain in Settings in the left navigation panel.
 - Proceed to Recordings at the top.
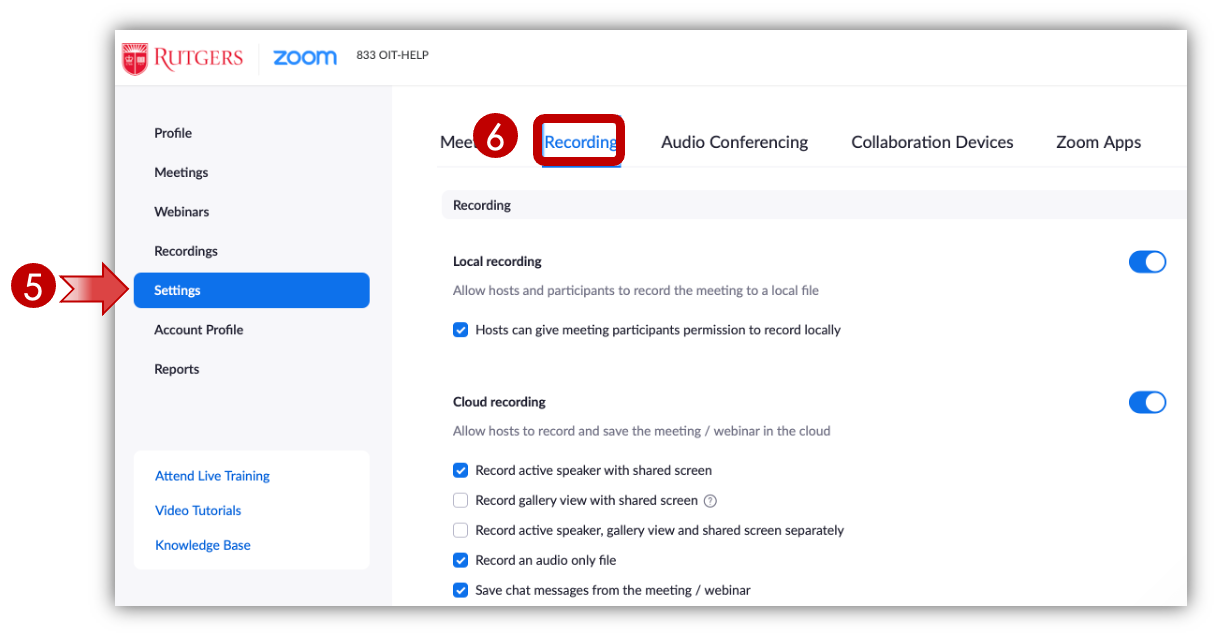
- Scroll down to Cloud recording.
- You may optionally choose to select to record the active speaker with shared screen.
- Select Audio transcript.
- SAVE!
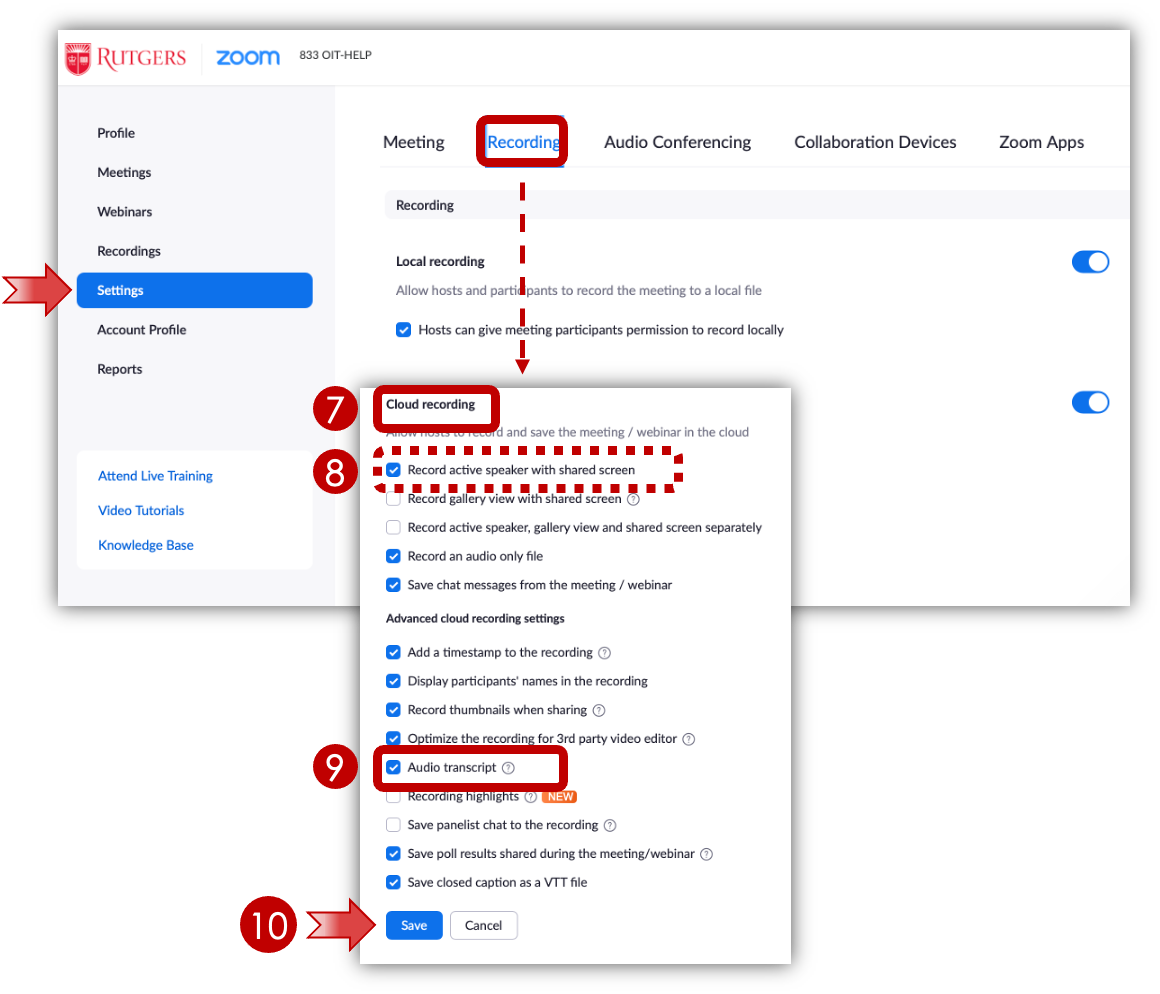
-
-
Record Your Talk in Zoom
You may follow the steps below and/or watch this video demo!
Click on the images below to view them in full size.
There are two ways to start a new recording in Zoom.
A. From the zoom website in your browser.
- In the upper right section of the screen, select HOST A MEETING.
- Choose the option With Video On.
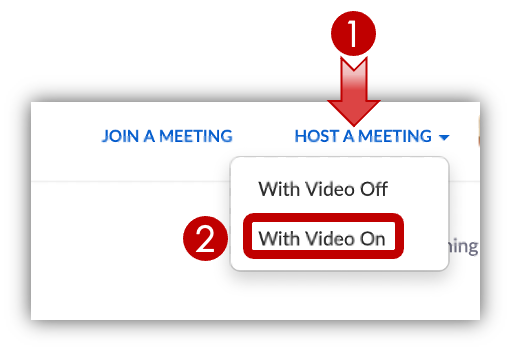
- When the message pops up on screen, select Allow.
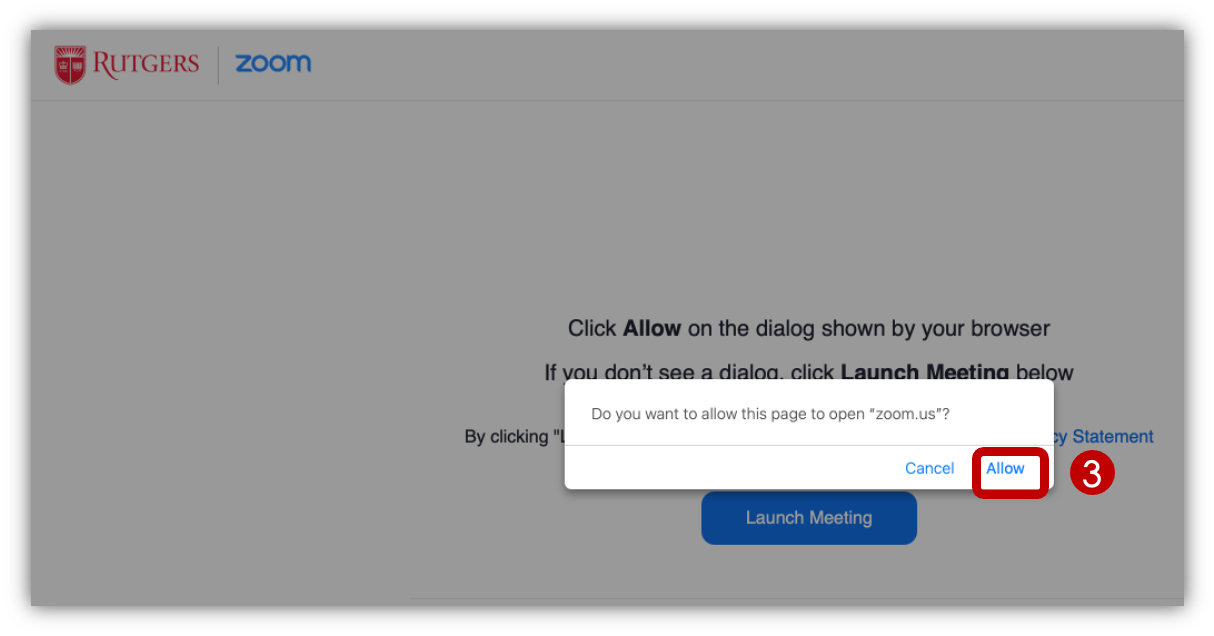
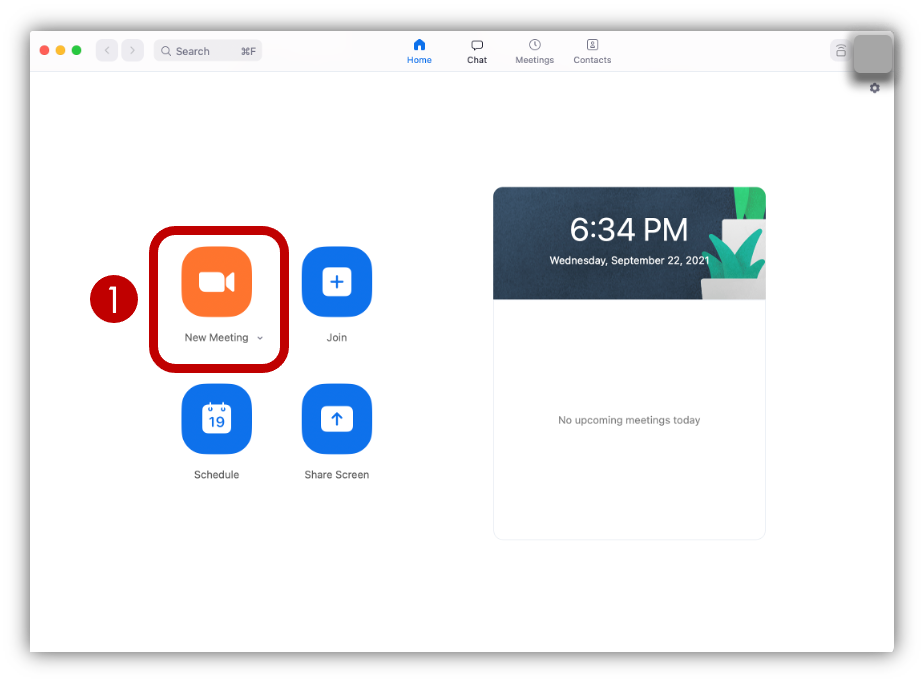
B. From the zoom application on your computer.
Once Zoom has opened, proceed with the following steps:
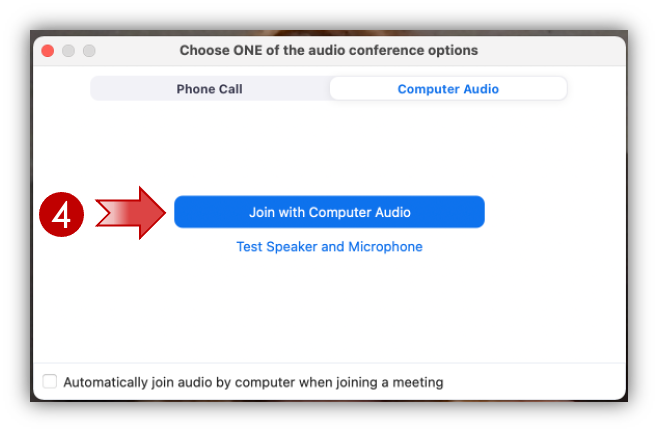
- When the audio conference options pop-up window appears, select Join with Computer Audio.
- When you are ready to record your talk, click on Record at the bottom of the screen.
- When the two options appear, select Record to the Cloud.

- To share your screen, select the Share Screen option in this same panel.

When the share screen window displays, select the application you are sharing from the selections pictured there (e.g., pdf, Powerpoint). - If you are sharing audio, you should toggle the option to Share sound to on. If you are sharing video, be sure to toggle the option to Optimize for video clip to on.
- Click Share.

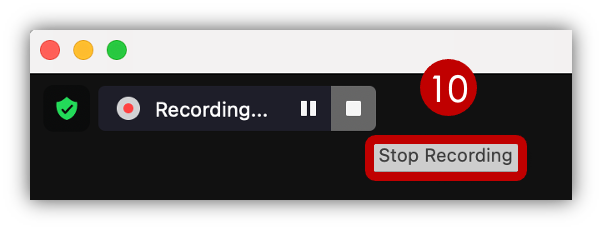
- When you finish your talk, click on Stop Recording in the upper left corner of the screen.
It will take a few minutes for your Zoom recording to render and be sent to the cloud. Be patient!
Once your zoom recording is ready, it will be accessible back at the website (zoom.us). Instructions for accessing your cloud recording are below.
-
Access Your Cloud Recording in Zoom
You may follow the steps below and/or watch this video demo!
Click on the images below to view them in full size.
Go back to Zoom.us to find your recording in the list of cloud recordings.
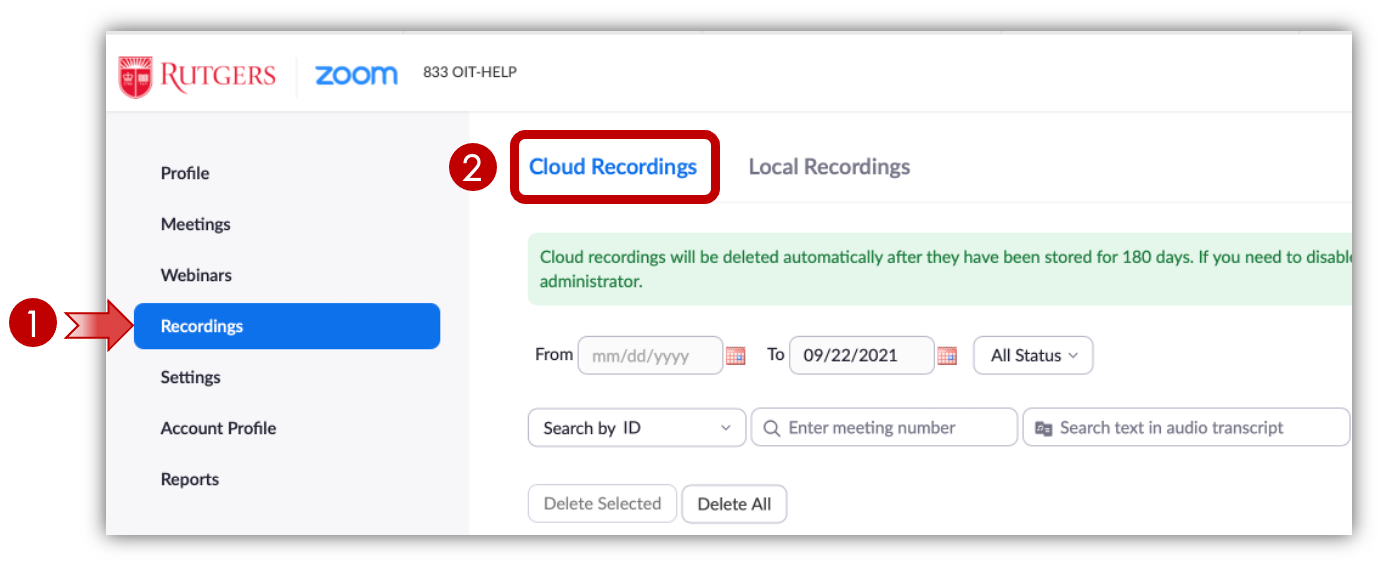
- Navigate to Recordings on the left.
- Select Cloud Recordings (not Local).
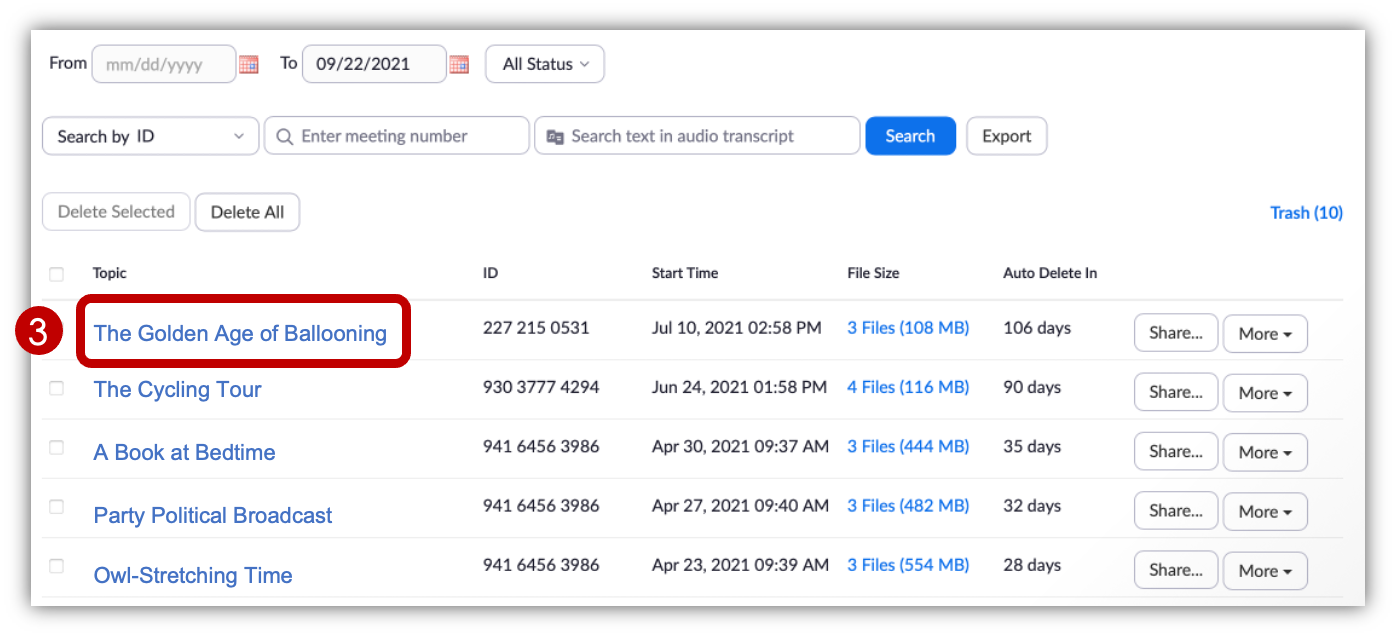
- Find your recording in the list below, and click on it.
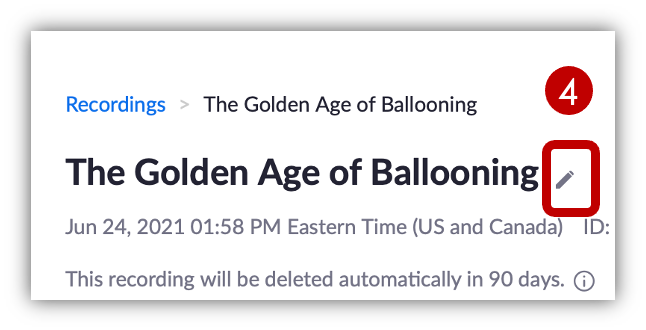
- Click on the pen icon to the right of the file name to rename your recording topic with the NELS 52 file naming convention. Type the new name over the old text. Rename your file as follows:
LASTNAME - TITLELASTNAME: Last name of the first author in all caps
TITLE: Full title of presentation (or at least the first 4-5 words)
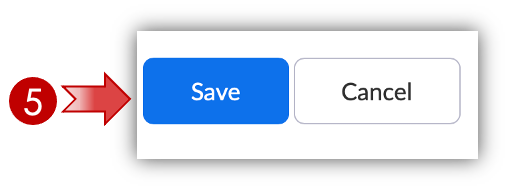
EXAMPLE: CLEESE – Sluicing and Ballooning - Click save
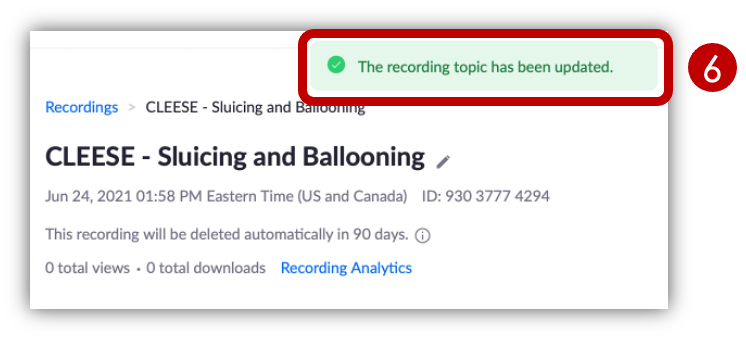
- You will see the new name appear in place of the former one, and a green text box will appear in the upper right indicating that The recording topic has been updated.
- Repeat (4) and (5) for Recording 1 in the list.
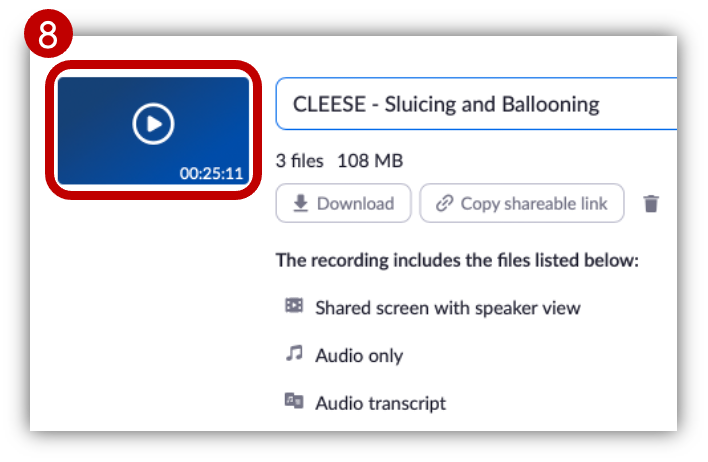
- You are now ready to edit the Audio transcript! To do so, do not click on Audio Transcript at the bottom. Instead, click on the blue rectangular image of the recording with the white arrow to the left.
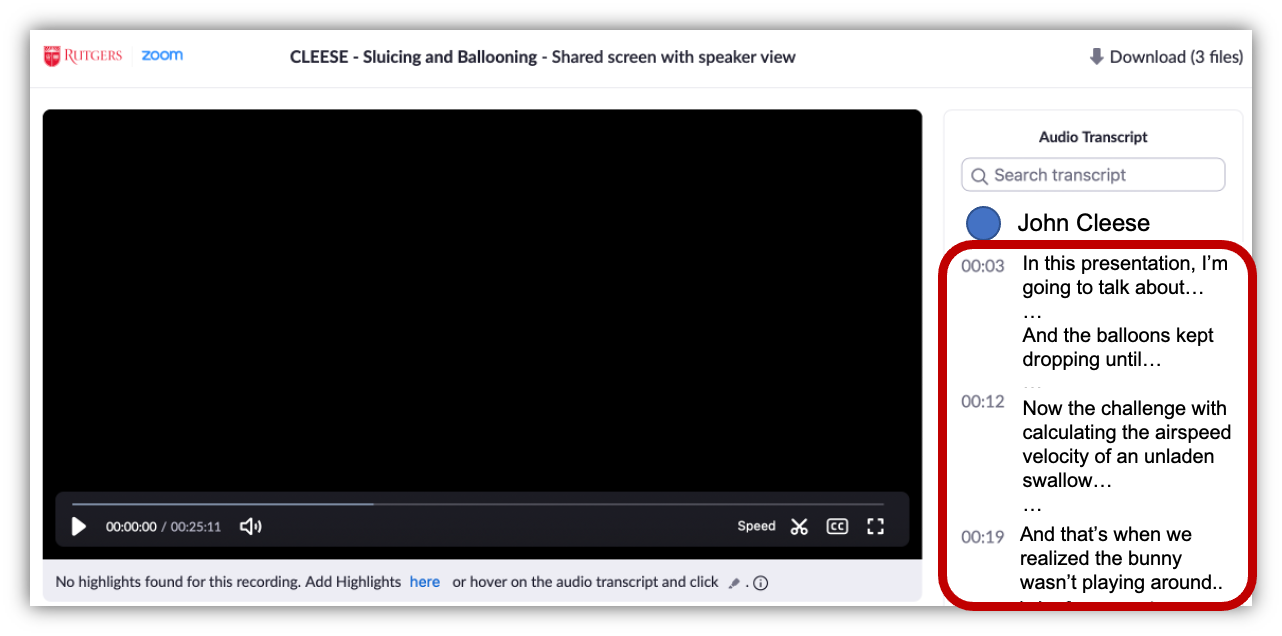
- You will now see a screen with your video in the center and the audio transcript to the right. You will be reviewing this audio transcript and making edits as necessary.
-
Review and Edit Your Audio Transcript in Zoom
You may find this video demo of one of our grads editing an audio transcript in real time helpful! (And some of you might just recognize the paper!)
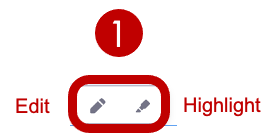
- Next to each chunk of text in the audio transcript, you will see two icons: edit (left) and highlight (right). When you need to edit the transcript, click on the Edit icon.
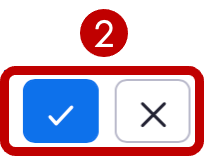
- Edit the text directly. When you are satisfied with the edit, click on the Save icon for that particular chunk of text before moving on to another below it.
- Once you have fully edited your transcript, return to the screen in (6)-(8) with the file name. Click on Share in the upper right, so that you can share the zoom recording with NELS52 on OSF!
- Make sure you have Share this recording … Publicly toggled on.
- Make sure you have allowed viewers to download and see the transcript. The first (expiration date) and last two options (registration, passcode) should be toggled off.
- Click Copy Sharing Information. (Doing so automatically copies the information for you. This is the same content as you see when you select Show … Sharing Information.)
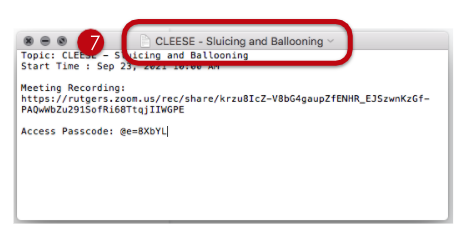
- Paste the copied information to a word editor (textedit, wordpad, etc.) and save the file as a .txt file following the same naming convention as the title of the recording:
LASTNAME - TITLEEXAMPLE: CLEESE – Sluicing and Ballooning
- Upload the text file into the Dropbox folder through this link.
