SRDR+ 3. Uploading Article Citations
Before you can assign screening tasks or assign articles for extraction, you will need to upload all your article citations into SRDR+. This page provides instructions for how to do this.
- 3.1 Adding Citations One at a Time
- 3.2 Adding Many Citations from a File
- 3.3 Confirming Correct Citation Format
- 3.4 Deduplicating
You will enter the citations for your article under the Project Info / Citations link.
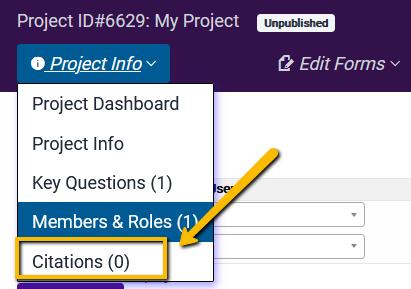
You will now be on the Citations page. There are a couple of ways to add citations. You can add citations one at a time or in bulk if you have the list of citations in a reference manager export file.
3.1 Adding Citations One at a Time
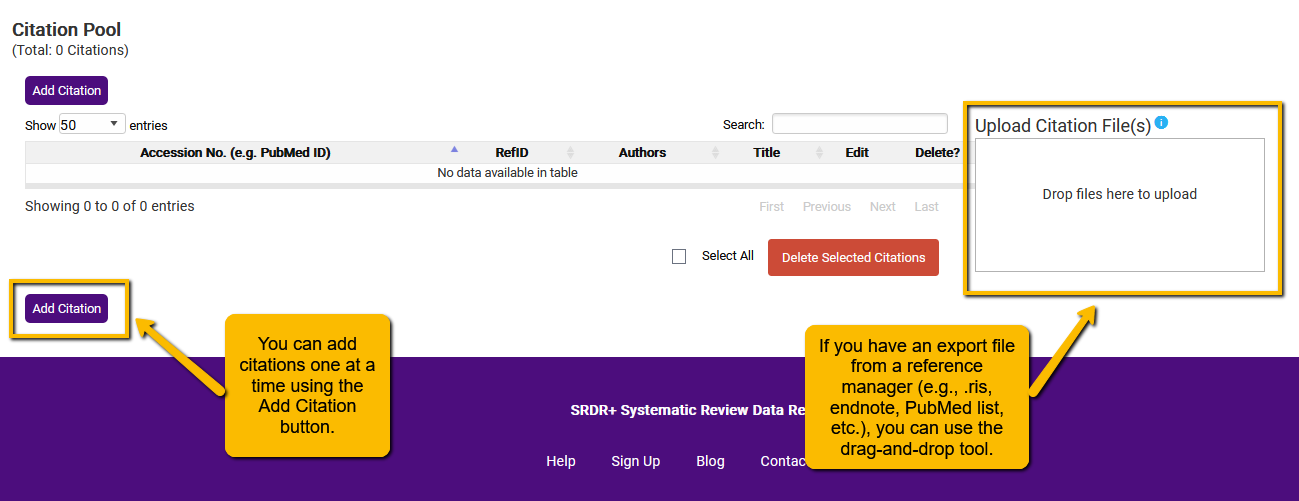
Click on the Add Citation button.
When you click on the Create Add Citation link, a dialogue box opens.
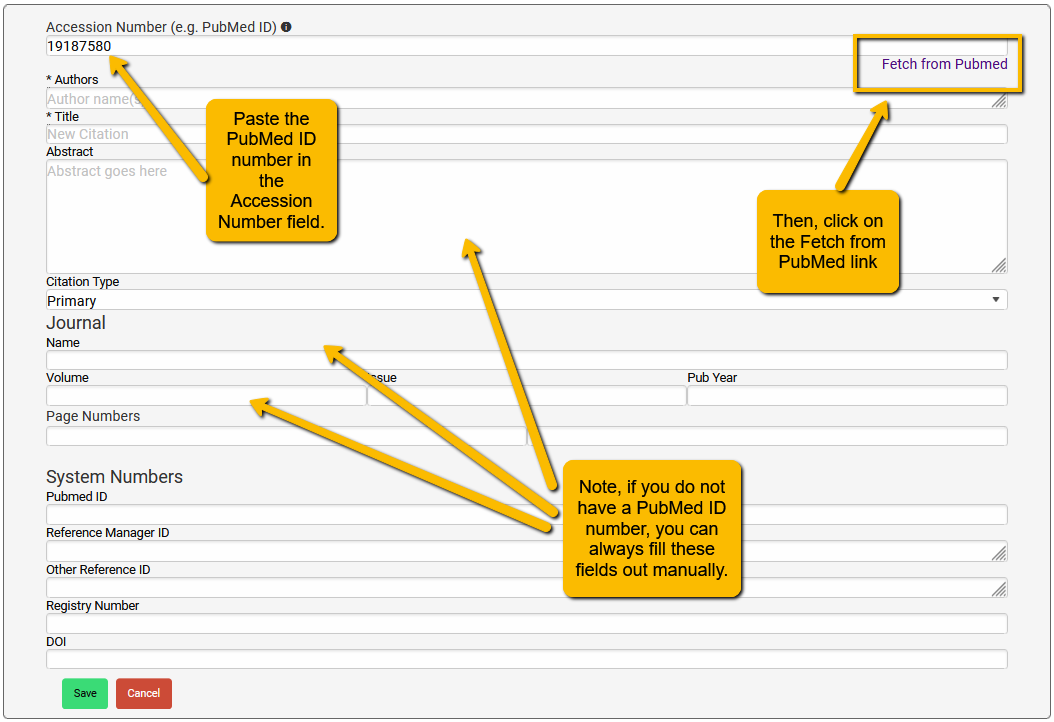
You now have a couple of options:
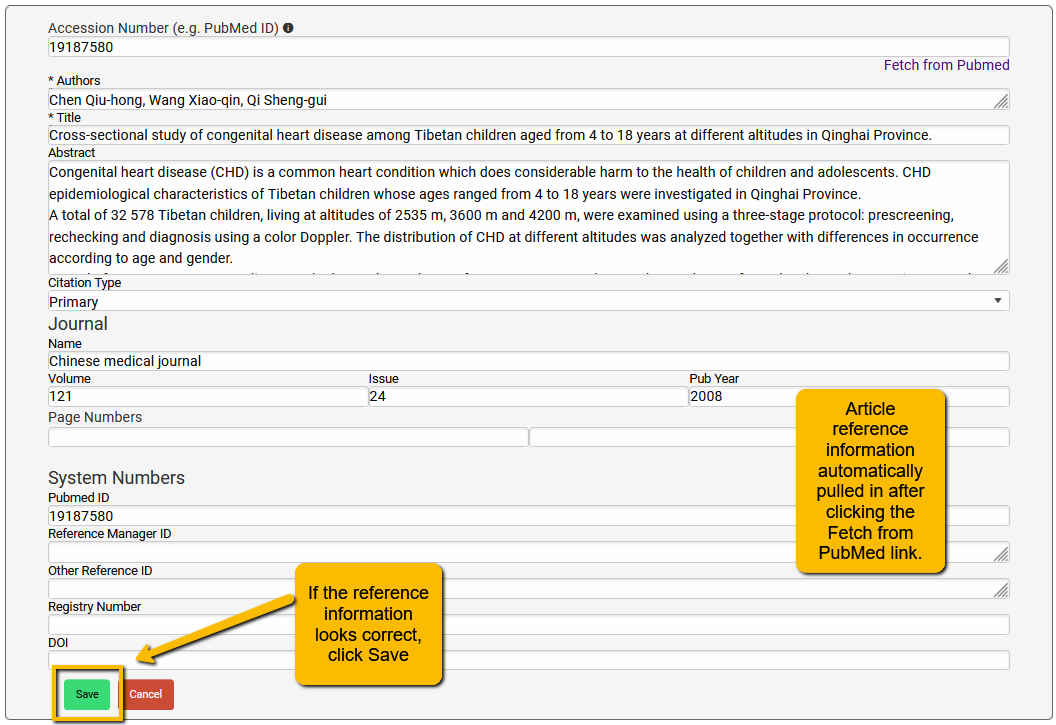
First, you can manually type the citation information into the fields. We recommend that you use this option only if the articles not not have a Pubmed ID number.
Second, you can enter the Pubmed ID number into the top Accession Number field and click on the Fetch from Pubmed link.
When you click the Fetch link, SRDR+ will populate the citation fields automatically.
3.2. Adding Many Citations from a File
If you have collected your citations in a reference manager file or a comma delimited spreadsheet file, you can upload many citations at once.
It is important to know which types of files to upload (trying to upload the wrong type of file will not only NOT work, but may import junk into your citation list). So, be sure to look at which types of files you can upload.
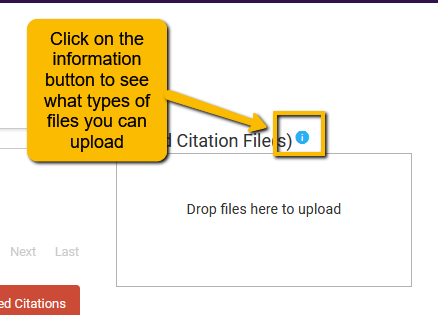
Here are the types of files you can upload.
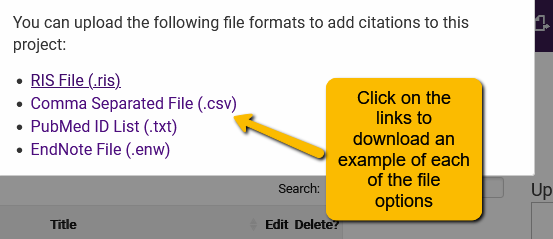
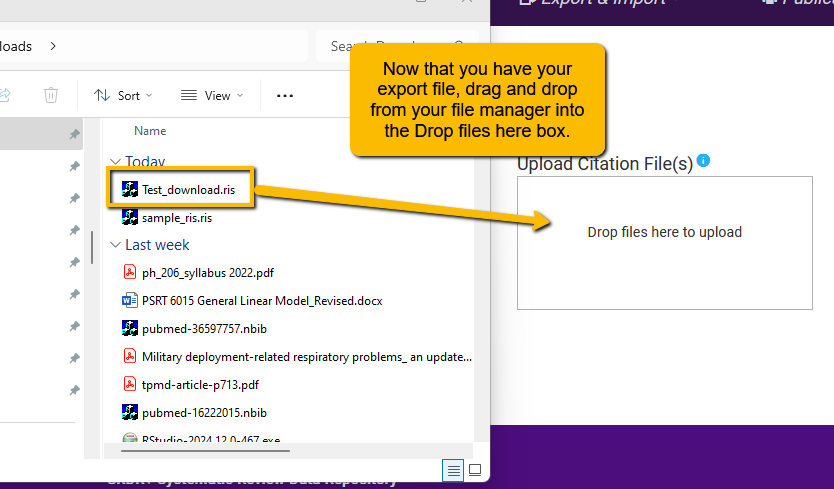
Note that clicking on any one of the file type links listed above will download a template into which you can enter information on your articles. Once you have entered the reference information into the file template, just save and drag and drop the file into the Drop Files Here to Upload box.
Special Note for Endnote Export: If you are using Endnote 20 or later, you may want to export the selected references as a text file but use RefMan (RIS) Export output style. Use the following settings:
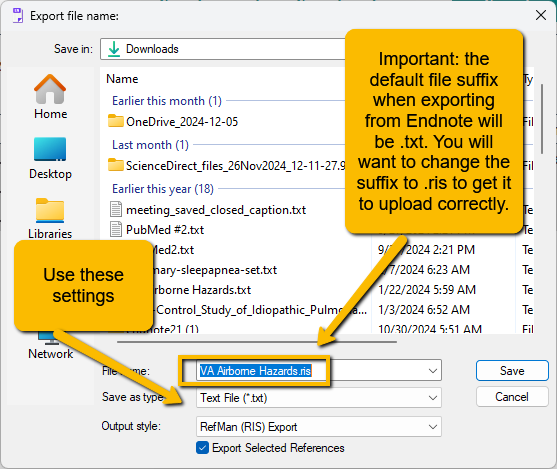
Once the citation export file is created, you can simply drag and drop into the box.
3.3 Confirming Correct Citation Format
Once you have uploaded your file, you will now need to confirm that the file and the cite structure is correct.
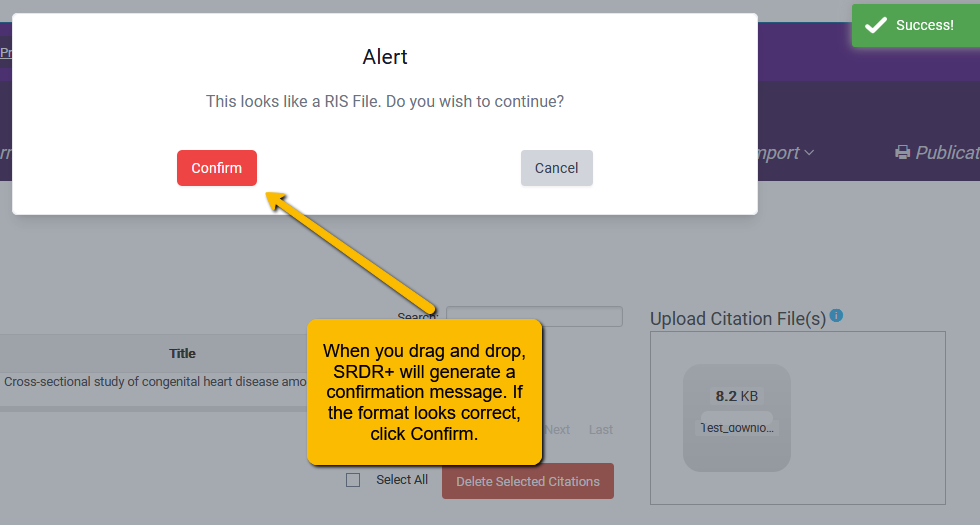
Your citations will not upload immediately. SRDR+ will require you to confirm that the detected format of the file is correct. If it is, then click Confirm.
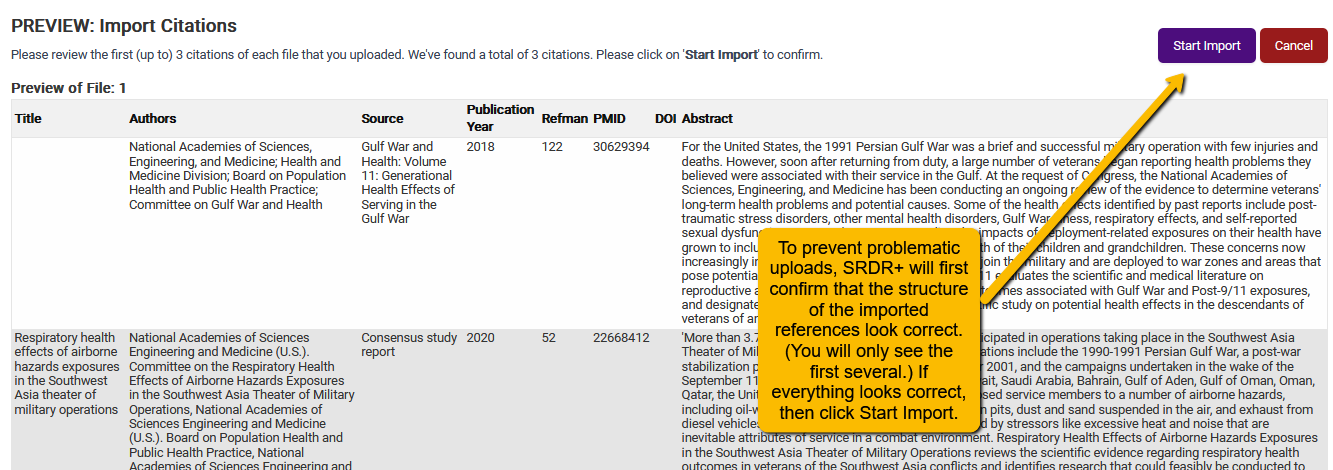
SRDR+ has one more confirmation step: it will show you an example of the uploaded citations. If the format looks correct, then click the Start Import button.
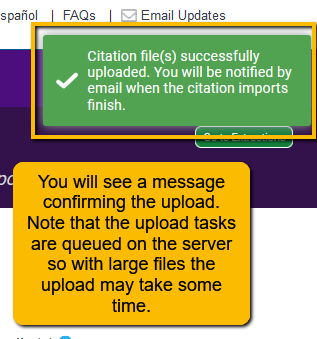
You will now receive a message that the file is being uploaded. Because upload jobs are queued on the server, with large files this can take some time. You will receive an email confirmation when the upload is completed.
If you have a small number of references, then you can click the refresh button, and you should see the newly uploaded citations.
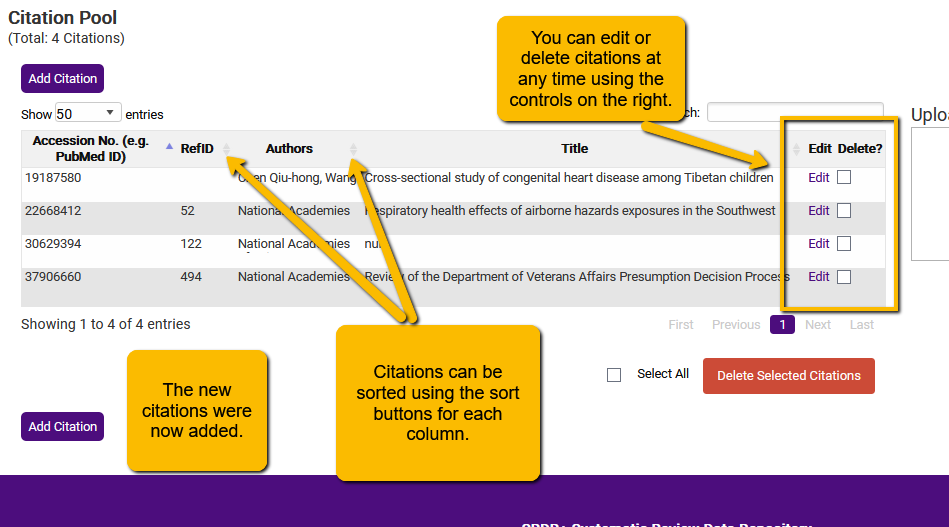
When the upload is complete, you can navigate back to the citations page.
There are several options for dealing with the uploaded citations.
You can reorder citations by clicking on the sort buttons in each column.
You can edit or delete citations using the controls on the right side of the page.
3.4 Deduplication
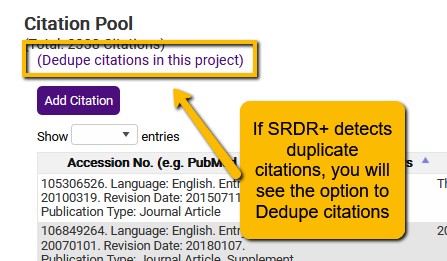
Even though you will likely have deduplicated citations within your reference manager, deduplication is often imperfect. So, don’t be surprised to find that SRDR+ has detected duplicate references.
If you have duplicate references, you will see an option at the top of the page to deduplicate the citations. You can click on this to deduplicate.
