For this summer’s Summer Tales Creative Contest I submitted a 3D rendering of a “knitted” wren in a nest inspired by Li-Young Lee’s “Persimmons,” one of the poems selected for Summer Tales. “Persimmons” discusses language construction and living between intersectional identities. Lee’s speaker discusses getting into trouble at school with a teacher by confusing similar sounding words with vastly different meanings. One such example is “wren and yarn.” The speaker recounts:
“Wrens are soft as yarn.
My mother made birds out of yarn.”

Process:
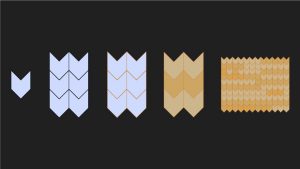
I created a swatch of knitted fabric in Google drawings. I chose Google drawings for the simple reason that I did not have access to a more advanced software. This was done by creating the stitch shape, then I copied and pasted them together to create the swatch. I then changed the outline of the stitch to better match my “yarn” color. Then I colored each swatch in to create the pattern with custom created colors that I individually colored in. My goal was to create the appearance of something knit with a space-dyed yarn.
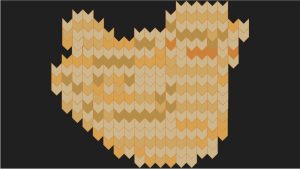
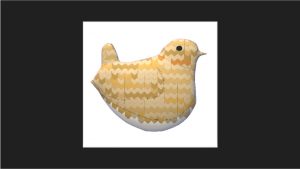
I then created the rough outline of a wren from research of both wrens and animaguri wrens that I found from a web search. The resulting image, which I affectionately called “the chicken,” is visible here.
I then drew my bird shape on top and changed some of the stitch colors in proximity to the head and wing to draw attention to the fact that these are different parts of the body. I also added an eye. Google Drawings creates a file with no background which made the rest of the process much easier.

Rutgers provides the opportunity for registered students to remotely access the computer labs. I remembered seeing 3D paint on the computer lab computers when I worked on the Reference Desk at the Alexander Library. I was able to login and use the software remotely.
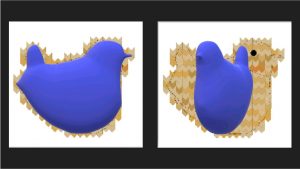
I opened up the 3D paint application and selected the tool to free draw a 3D object. I then created the 3D bird shape.
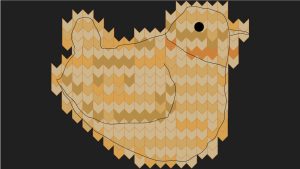
Next, I imported the knit swatch and added it as a sticker to my blank canvas. I then drew around the outline of the bird and rendered it in 3D. I then saved my imported knitted bird as a stamp.
Importing my image as a stamp allowed me to add it over the 3D rendering that I created. I then put the stamp onto the bird shape that I made and re-sized it to make it fit.
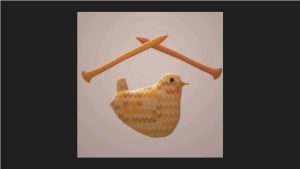
Next, I created the knitting needles by using the same process as I used to create the bird. I added a wood texture stamp from 3D paint, adjusted the orientation, and stretched it to cover the needles. I then changed the angle and plane of the needles to create more three dimensionality and the appearance of them “knitting.”
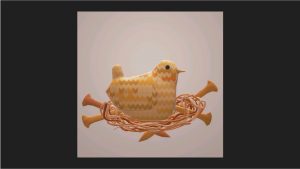
I then replicated the needles to act as the basis for the bird nest. I wove threads of different custom colors and different “gauges” of yarn around the needles. I did this by selecting a tool that would allow me to draw in 3D to create the yarn. I created custom colors again that were used in the needles and the bird to create contrast. Some of these threads were also moved across planes to make them look more 3D.

Then I drew the branches so that the bird’s nest would have a location to sit. This was also done with a 3D rendering tool in yet another custom color. Next, I put the bird and nest into the tree/branches that I created. Finally, I went into the lighting effects to change the direction of the light source for shading and to better emphasize the 3D nature of the bird to make it look more like a knit object.