People Creation Process
Creating a new People entry is very similar to the process of creating a page or post. However, there are some key factors that differentiate the People creation process, primarily in how and where your content is displayed to viewers.
Basic Information
The basic elements of a People entry include the same title field and full-width WYSIWYG (What You See Is What You Get) text editor that you’d use to create a page or post.

In this case, however, the title field represents the full name of the person for whom you are creating a People page.
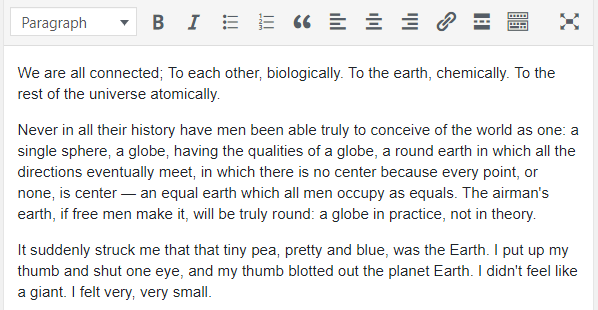
You can then enter content in the Full-Width WYSIWYG (What You See Is What You Get) text editor much like you would on any other page or post.
The content that you enter in this field will appear prominently in the People entry, right after the individual’s name and People Type.
We recommend using this part of the page as an “About Me” section to serve as the individual’s bio.
Featured Image
A People page’s Featured Image can be used to display an individual’s portrait.
You can upload a Featured Image using the module at the lower right-hand side of (or below, depending on your display settings) the WYSIWYG text editor while creating or editing a People page.

Clicking “Set Featured Image” in this module will open your site’s Media Library, where you can then select or upload your chosen image.
The Featured Image will display in the sidebar at the top of a People page, right before their contact information.

It will also appear next to their name when displayed on the All People or People Reorder pages.


Check our Media Library documentation to learn more about compatible file types and the recommended dimensions for featured images.
Contact Information
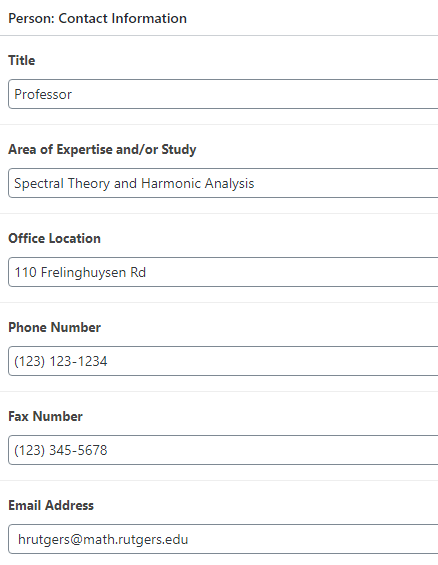
The Contact Information module is meant to contain basic information about an individual, such as their job title, office location, and phone number.
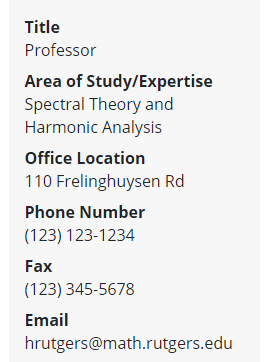
This information is automatically formatted, and added to a People page’s sidebar, right below the Featured Image.
The Title field will also be displayed on the All People page.

Other Information
The Other Information module is meant for displaying relevant non-biographical information, such as an individual’s credentials, courses taught, and social media links.
Much like the Contact Information module, the information you input here will be automatically formatted and displayed in different sections of the page.

Publications
The Publications section is a way of easily representing all your published works.
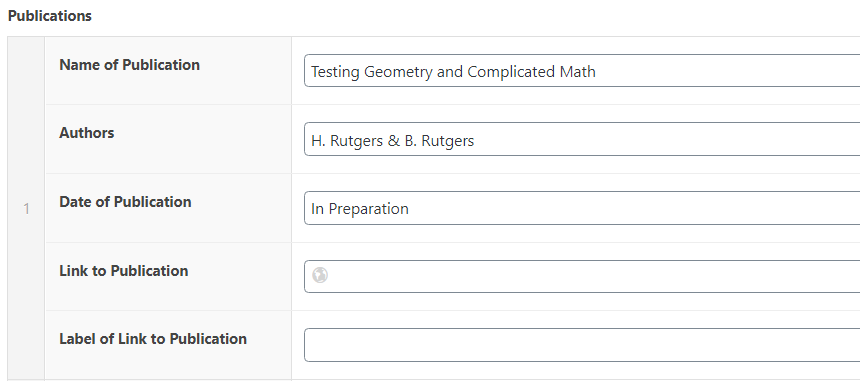
You can input the name, authors, date of publication, and a link (along with the title of that link) for each individual publication.
This information will be automatically formatted and displayed in the body of the People page as a list.

If you’d like to add another publication, you can click either the “Add Publication” button below these fields, or the plus icon that appears to the side of these fields while hovering over them. Another set of fields will appear, in which you can input more publication information.

Awards & Distinctions
The Awards & Distinctions section is intended to easily present achievements and distinctions.
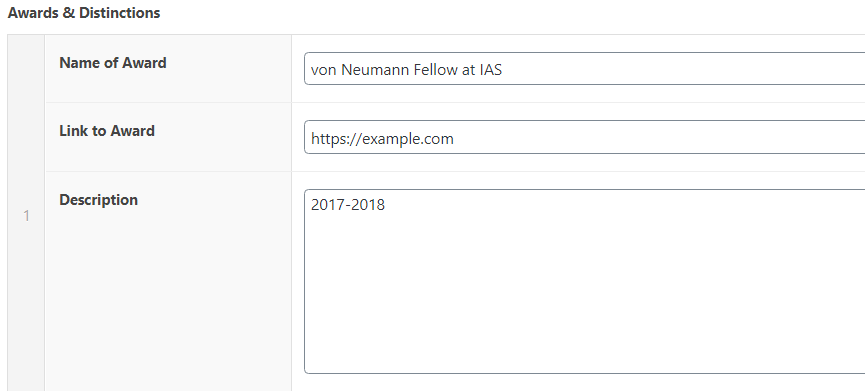
In these fields you can input a name, link, and description for each individual award.
In this case, if you input a link under “Link to Award”, the award will automatically link to that page.
This information will be automatically formatted and displayed in the body of the People page as a list.
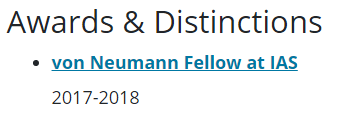
If you’d like to add another award, you can click either the “Add Award/Distinction” button below these fields, or the plus icon that appears to the side of these fields while hovering over them. Another set of fields will appear, in which you can input more award information.

Courses Taught
The Courses Taught section can be used to easily present the courses you teach.

In these fields, you can input the name and link for each course. If a link is provided, the name of the course will automatically link to that page.
This information will be automatically formatted and presented in the body of the People page as a list.

If you’d like to add another course, you can click either the “Add Row” button below these fields, or the plus icon that appears to the side of these fields while hovering over them. Another set of fields will appear, in which you can input more course information.

Social Links
The social links section can be used to easily link out to social media pages or websites from a People page.

In these fields, you can select a social media platform from the dropdown list and input a link (along with the title of that link) for each individual social media page.

If you’d like to link to another social media page, you can click either the “Add Row” button below these fields, or the plus icon that appears to the side of these fields while hovering over them. Another set of fields will appear, in which you can input more social links.

You can also link out to an individual’s website by selecting the “Select Link” button.

This information will be automatically formatted and displayed in the People page sidebar as icons or links.
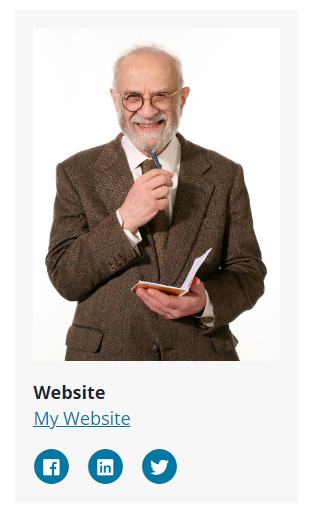
These social media icons will also be displayed in a person’s listing on the All People page.
